Good landing pages convert. Landing pages tested with A/B tools convert better.
Today’s conversion rate optimization tools (CRO) empower marketing teams to create A/B experiments and content changes easily. We all know the best of breed tools like Optimizely, Visual Website Optimizer or Test and Target- and we know that they let us drag content around the page with WYSIWYG editors that let us change content around with ease.
But this ease of use comes at a price. Historically, dev teams have rigorous processes for ensuring product quality which includes QA testing their products before pushing them live. But when the ownership of a landing page shifts to the marketing team, who is performing the QA on all those experiments? Chances are that the only eyes on those changes are owned by the person making the changes…one of the biggest no no’s in QA. Never test your own work.
The good news is that there is a solution. QA Test your A/B tests!
I’m going to map out how to use MyCrowd QA to your experiments and landing pages with ease. This will be a multi-part article, so stay tuned as we dive into each of the market leading products.
Let’s start with Optimizely and show you how to QA test a single experiment page in minutes.
First, the basics. You will need the following:
- A MyCrowd account. Click here for free upgrade to the Pro Plan.
- An Optimizely account.
The general idea is that each Optimizely experiment is several different versions of the same page. You will want to QA test each of these versions as you make them. MyCrowd provides a community of testers who can do this for you.
STEP 1 – Create an experiment in Optimizely
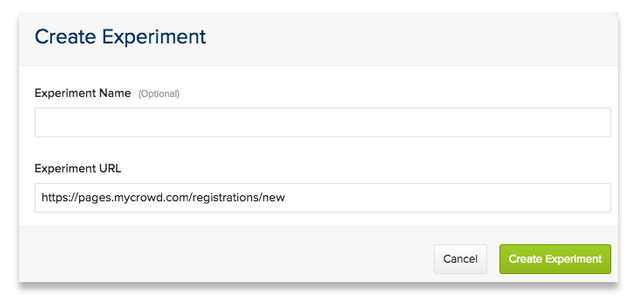
Start in Optimizely. We are going to be using the MyCrowd registration page as an example. The URL for this is: https://pages.mycrowd.com/registrations/new and this is important when creating my Optimizely experiment.
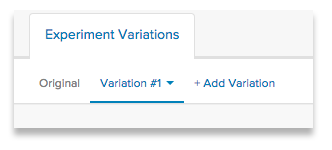
Create your experiment and enter in your url. Then create a variant of your original page. This is not a tutorial in Optimizely, so I’m just going to assume you know how to do all this…Once you have your variant your Optimizely UI should look something like this:
And the URL in your browser should look something like this:
Note the “experiment_id”, you should write that down as we will be using it in the next step.
STEP 2 – Create the test in MyCrowd QA.
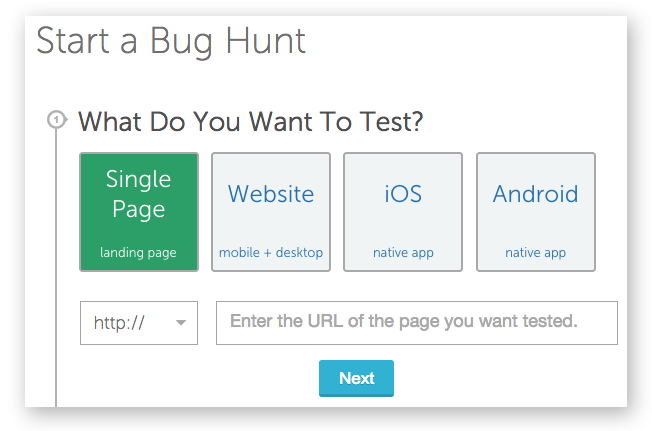
When starting a test in MyCrowd, you will select a “Single Page” website and then enter in the URL. Selecting the URL is going to require special attention, but don’t worry, I’ll walk you through it.
– Start a new Bug Hunt in MyCrowd by clicking the “+ New Test” in your UI.
STEP 3 – Configure your MyCrowd test
– The Start a Bug Hunt form will display. You want to select “Single Page” – landing page. You will notice a textbox appear asking for a URL.
STEP 4 – Set the URL to target your Optimizely variant.
– Compose the unique URL that will display your page and force Optimizely to display the exact experiment and variant that you want to test. The formula for this URL is below. You will be replacing the red text with your specific experiment ID and variant number.
Your URL + ?optimizely_xEXPERIMENTID=VARIATIONINDEX
So, for example: http://mytestpage.com/?optimizely_x10730927=1
(If you want to deep dive into how to set this parameter, here is the related Optimizely KB. https://help.optimizely.com/hc/en-us/articles/200107480-Force-a-specific-variation-to-run-and-other-URL-parameters-)
NOTE, one of the biggest mistakes folks make when configuring Optimizely is below:
STEP 5 – Target the right browsers and devices
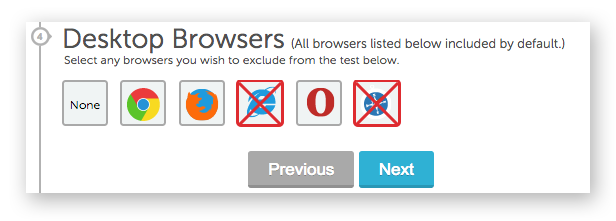
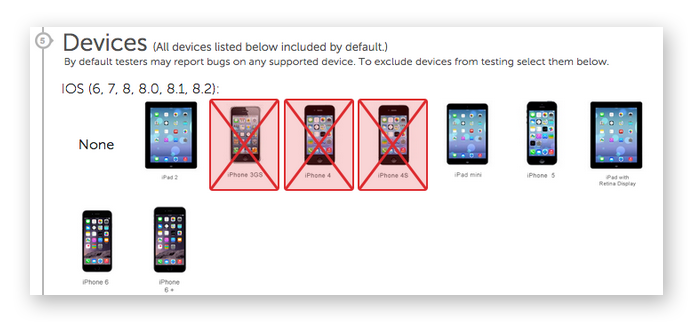
– When you configure your MyCrowd test, you can target specific browsers or devices by selecting or deselecting their image.
STEP 6 – Start the MyCrowd Test.
– You are past the hard part now, the rest is easy. Just set a budget and hit start. The MyCrowd QA service will start immediately and report any bugs or issues found in the content or incompatibility across browsers or devices.
STEP 7 – Get your results!
When the test completes you will receive an email from MyCrowd with the results. You can view the specifics of any defects found, including a detailed description and screenshots.
You can now publish your experiment in Optimizely with confidence, knowing that you (or your marketing team) did not introduce new bugs into your landing page.
Comments or questions? Let us know what you think
Happy Bug Hunting!


